How to Install Electricity in Your Shed
Please understand the safety and legal considerations of your project before beginning work; Practical Home Projects does not assume any liability for material or bodily harm.
Hi there. Having an unfinished space for storage, mechanic work, wood working, or even a weight room can be one of the most valuable parts of your home. Sheds are common solutions to that desire and having electricity set up will maximize the utility of your space. We’ll go into the different styles of sheds in another article, but for now let’s talk about powering up your space.
The level of investment in your electrical addition will depend on your intended uses of the outbuilding. Here are the three basic levels of electrification to choose from:
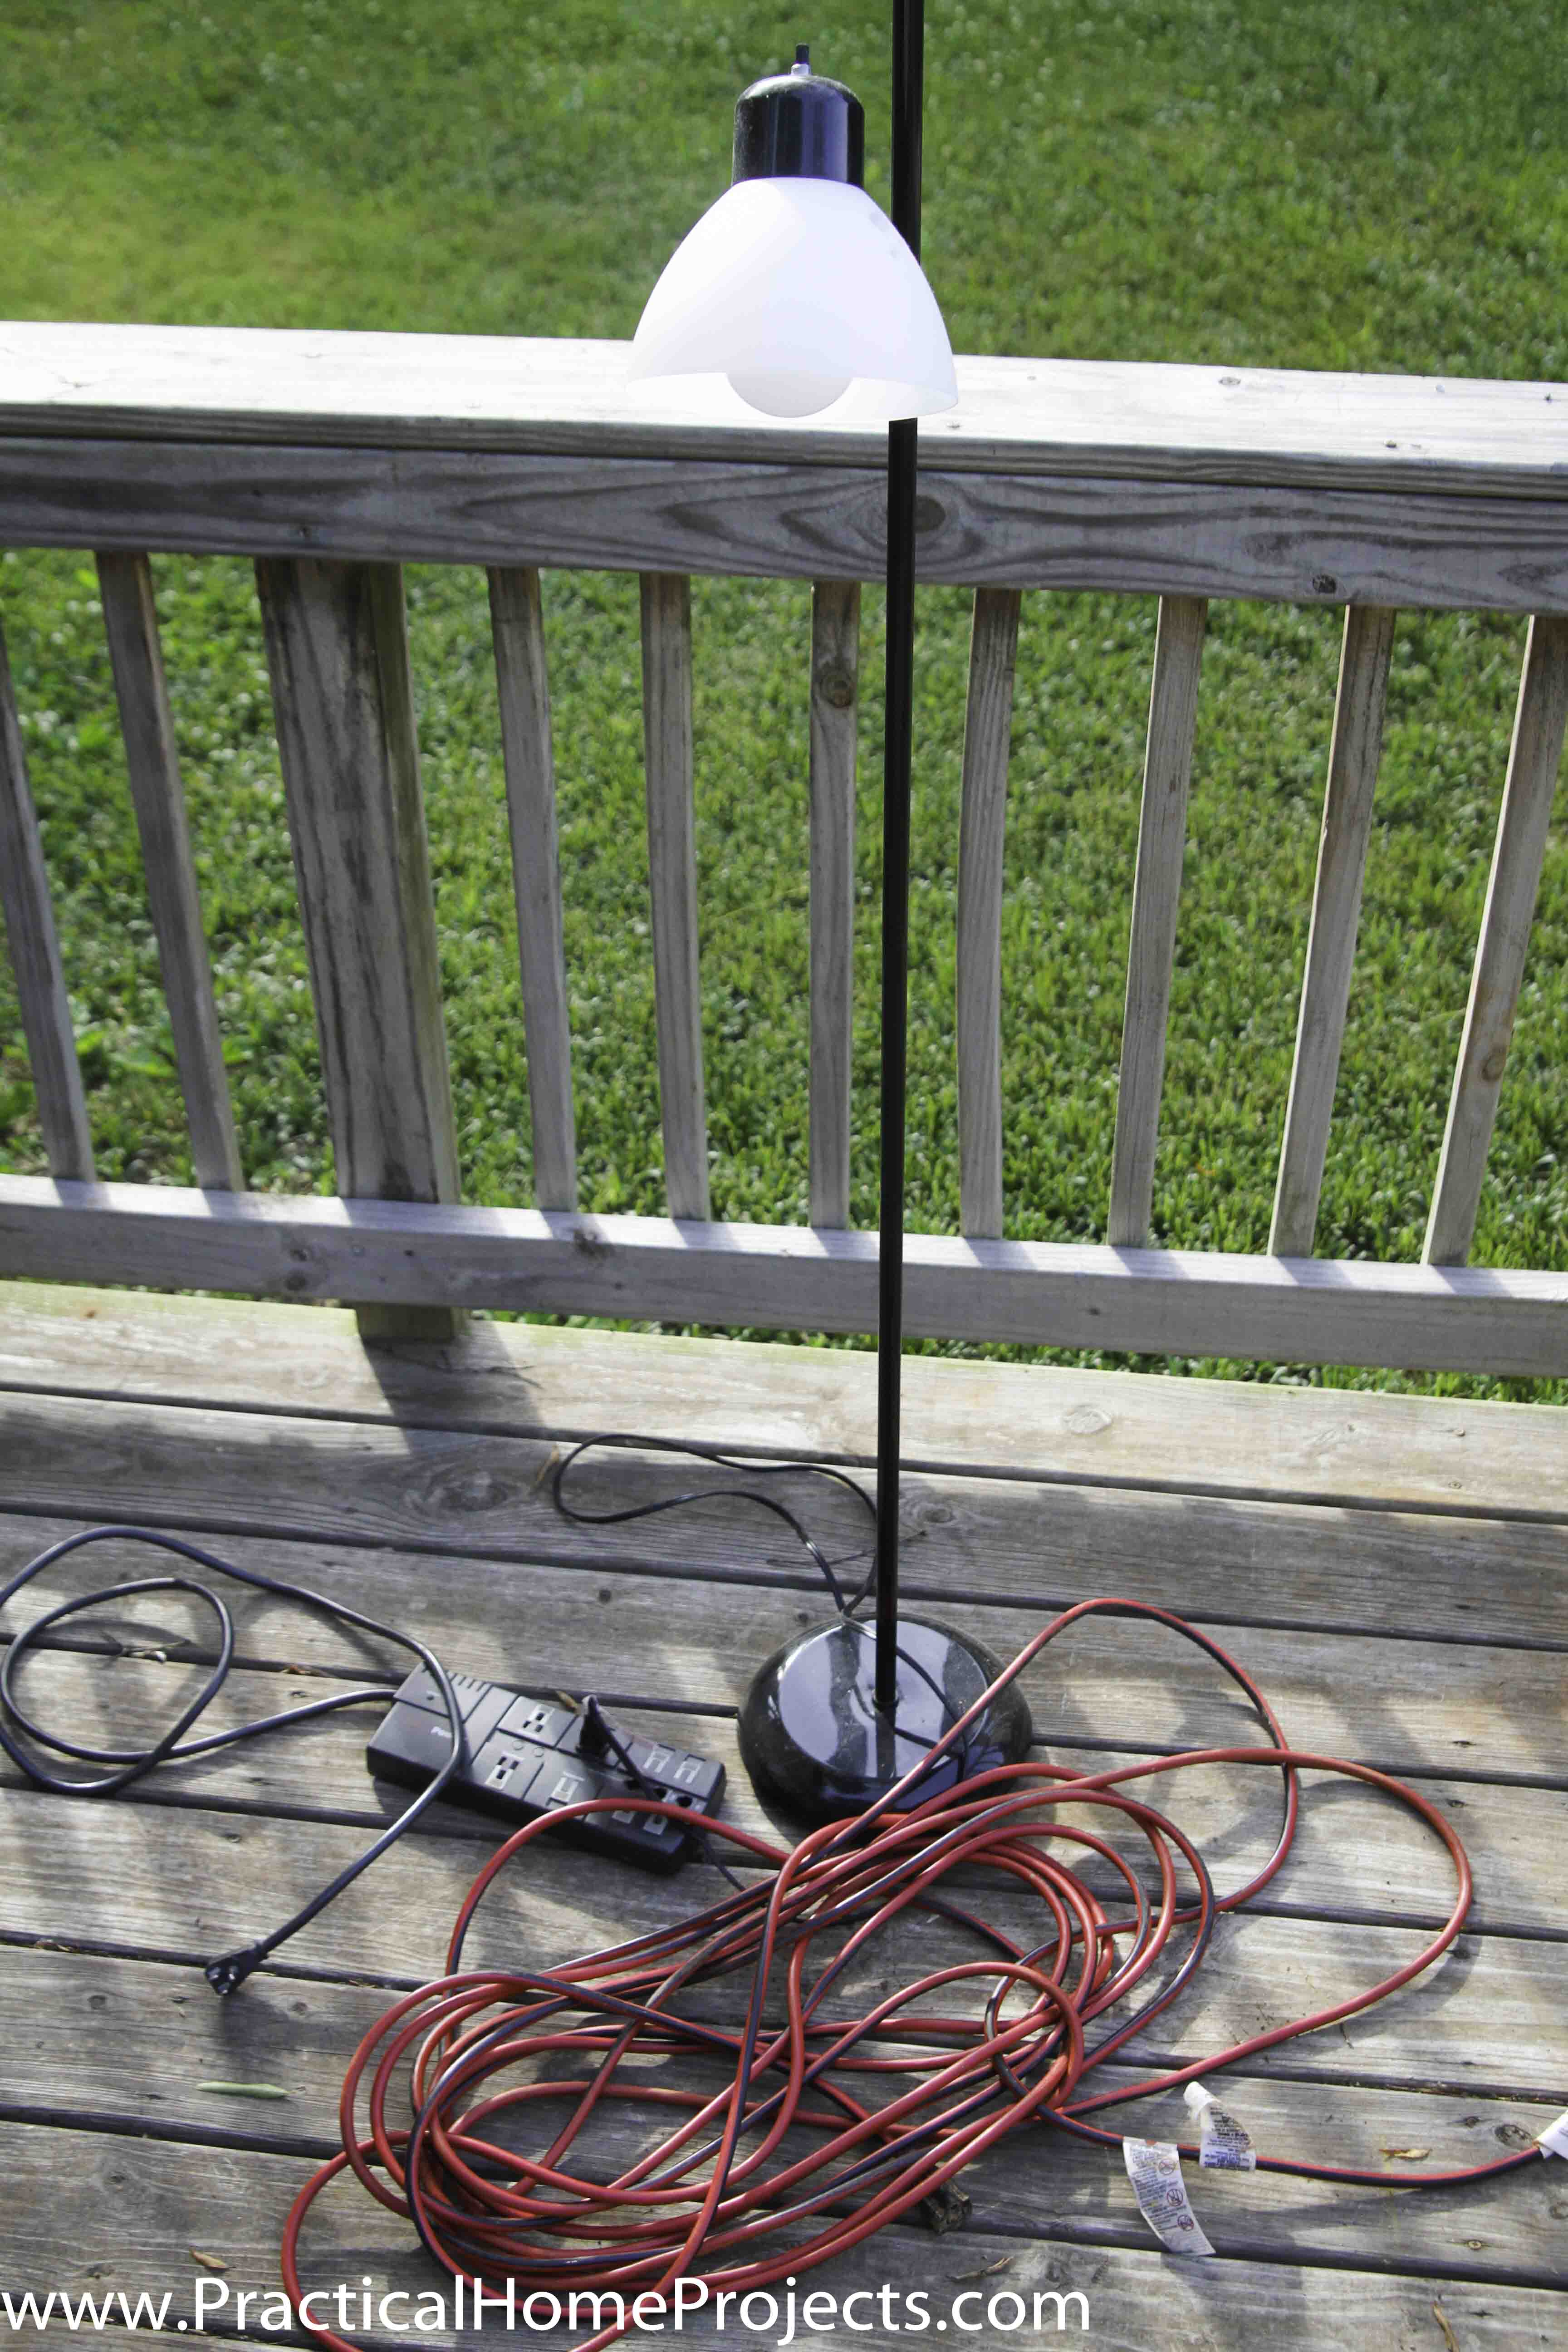
| Extension cord with power strip |
| The lowest cost investment is plugging an extension cord into the back of your house and running it to a power strip stored in the shed. You can plug in a few lights, run the vacuum, and other light duty items. |
| Best Uses: This option is cheap and doesn’t require any permanent modifications to your space. It’s great if you just need storage, or if you don’t want to make any modifications to your electrical system. This is usually the only option for rentals. |
| Shortcomings: The primary distinction between this option and the next is that extension cords aren’t designed to be in exposed places for long periods of time. The cord will have to be unplugged and rolled up when not in use or it will wear through and potential cause a safety issue. Extension cords typically have more resistance than hard-wired circuits and will not be able to handle any heavy tools. |
| Material Cost: $50 Time: 10 minutes for every use |

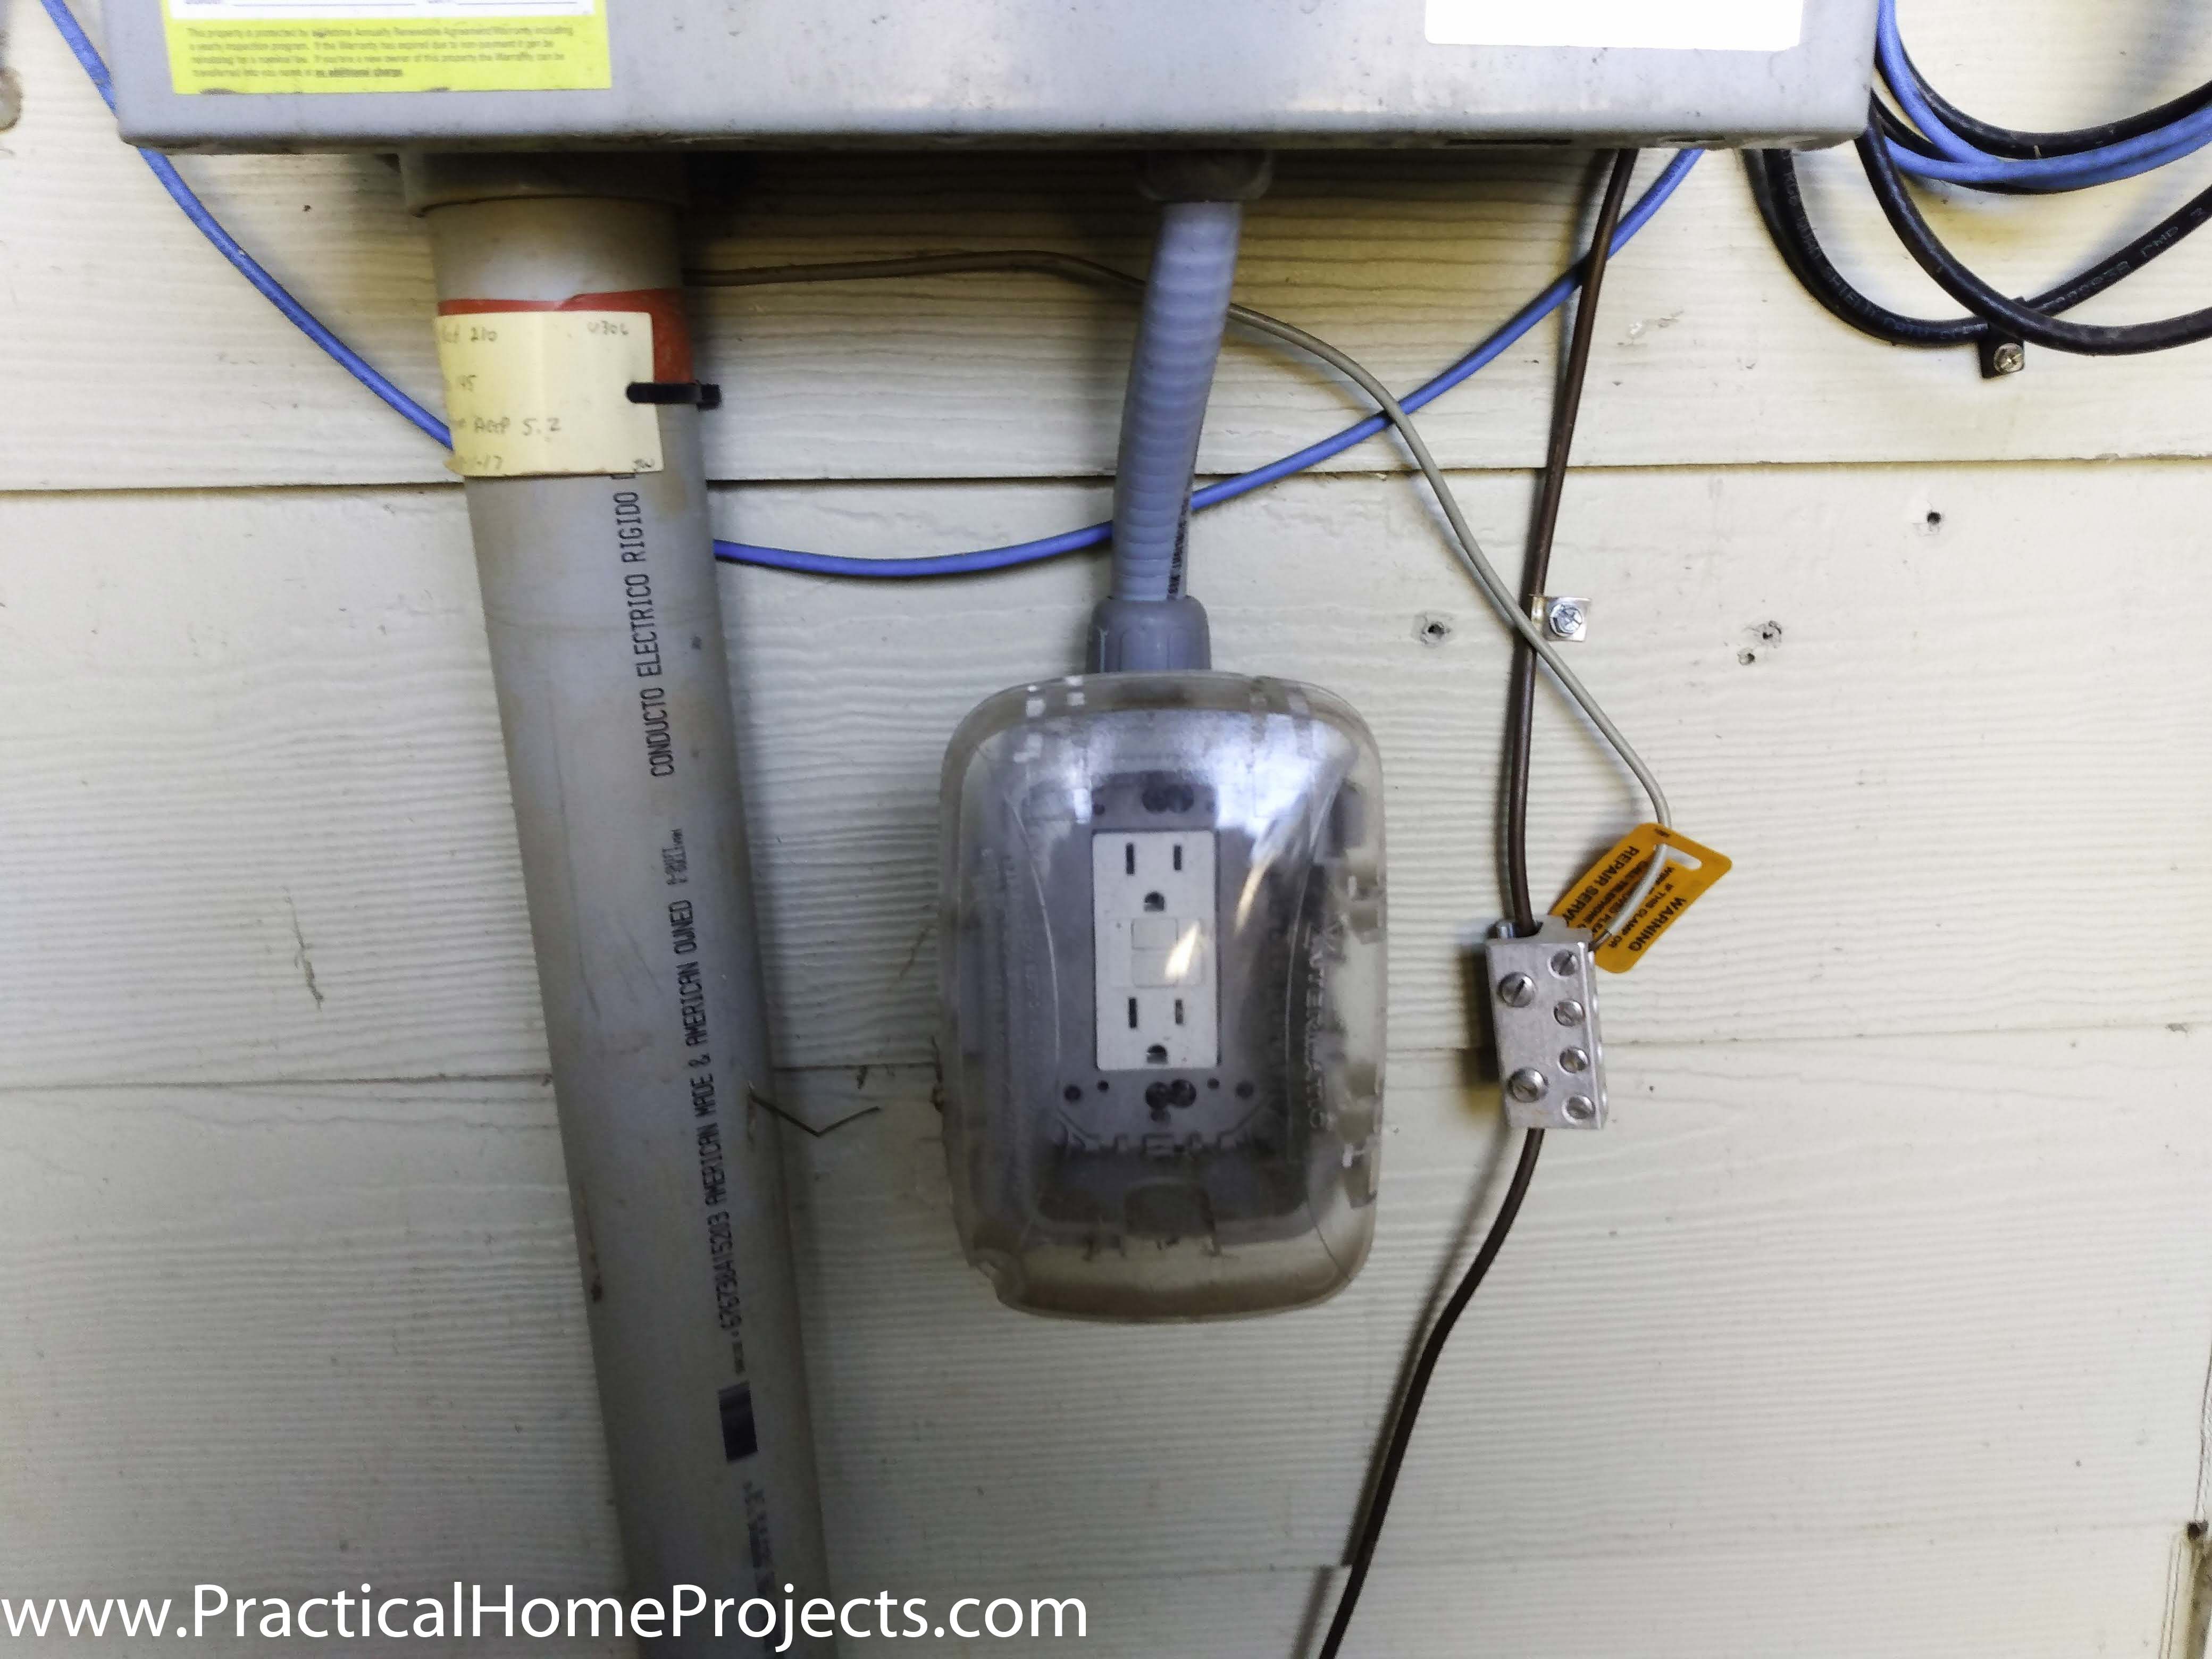
20 Amp GFI circuit |
| If you already have a 20amp GFI external circuit nearby, it may be fairly straightforward to add a feeder from that receptacle to your shed. You can then hardwire lights and a few outlets for future use. |
| Best Uses: This modification will still require a permit in most jurisdictions, but you aren’t working in the panel, and the burial depth isn’t as strict. This option will be sufficient for most folks who just intend to use the shed as any other room of their house. |
| Shortcomings: As sort of a middle ground between the other two options, this option may be best in some cases, but not for either extreme. The space still won’t be suited for any heavy power usage tools. And if you need to upgrade, most jurisdictions won’t allow you to simply add another 20amp circuit. |
| Material Cost: $250 Time: One weekend |

| 240 V Subpanel with 50-125 Amp supply |
| If you want to futureproof your space, go ahead and put a subpanel in it. Not one of those puny 6 circuit panels. Spring for a 20+ space panel because the extra $20 now is nothing compared to the peace of mind years down the road. This panel can pull the power of a small house and run all of the tools you need. Since your breakers are at hand, you can shut off circuits right at the source instead of going back to the house. |
| Best Uses: If you plan to have a workshop, or envision installing any heavy duty appliances like a space heater, washer/dryer, or Air Conditioner, then you’ll want a subpanel. |
| Shortcomings: The only shortcoming is the massive upfront investment of time and money. You’ll need to get a permit, and running the feeder direct from your panel may be a pain if it isn’t on the right side of your house. If you choose to dig a trench, set aside an entire weekend for digging even if you know a guy with a trencher or back hoe. This wire isn’t cheap either and you’ll have to protect it in conduit. |
| Material Cost: $600-$1500 Time: 3-5 weekends |

Since I’d like to turn the shed into a full woodworking shop, I personally chose to install a 60amp subpanel to ensure that it would have enough juice to run multiple types of high power equipment. Before embarking on your own electrical project, be sure to understand all of the safety and legal requirements in your locality.
First, it’s a good idea to draw your space and start planning out where to put outlets, panels, and other electrical components. One mistake I made, was planning to put the panel right next to the door, then realizing that the space was a few inches too narrow. Fortunately, there was a space on the adjacent wall, so it didn’t throw me off much. Pay attention to geometric considerations such as the location of your studs, joists, and rafters in addition to just the floor plan.
Location of switches are usually 48”, and outlets are 12” measured from the floor to the bottom of the junction box. Check your local jurisdictions, but usually the highest switch on the panel shouldn’t be more than 78” off the ground. Lighting is critical in a workspace; it’s smart to install a few light sources in different parts of the room so that you don’t create shadows as you work. If the shed is just a storage space, then a single ceiling light will be just fine.
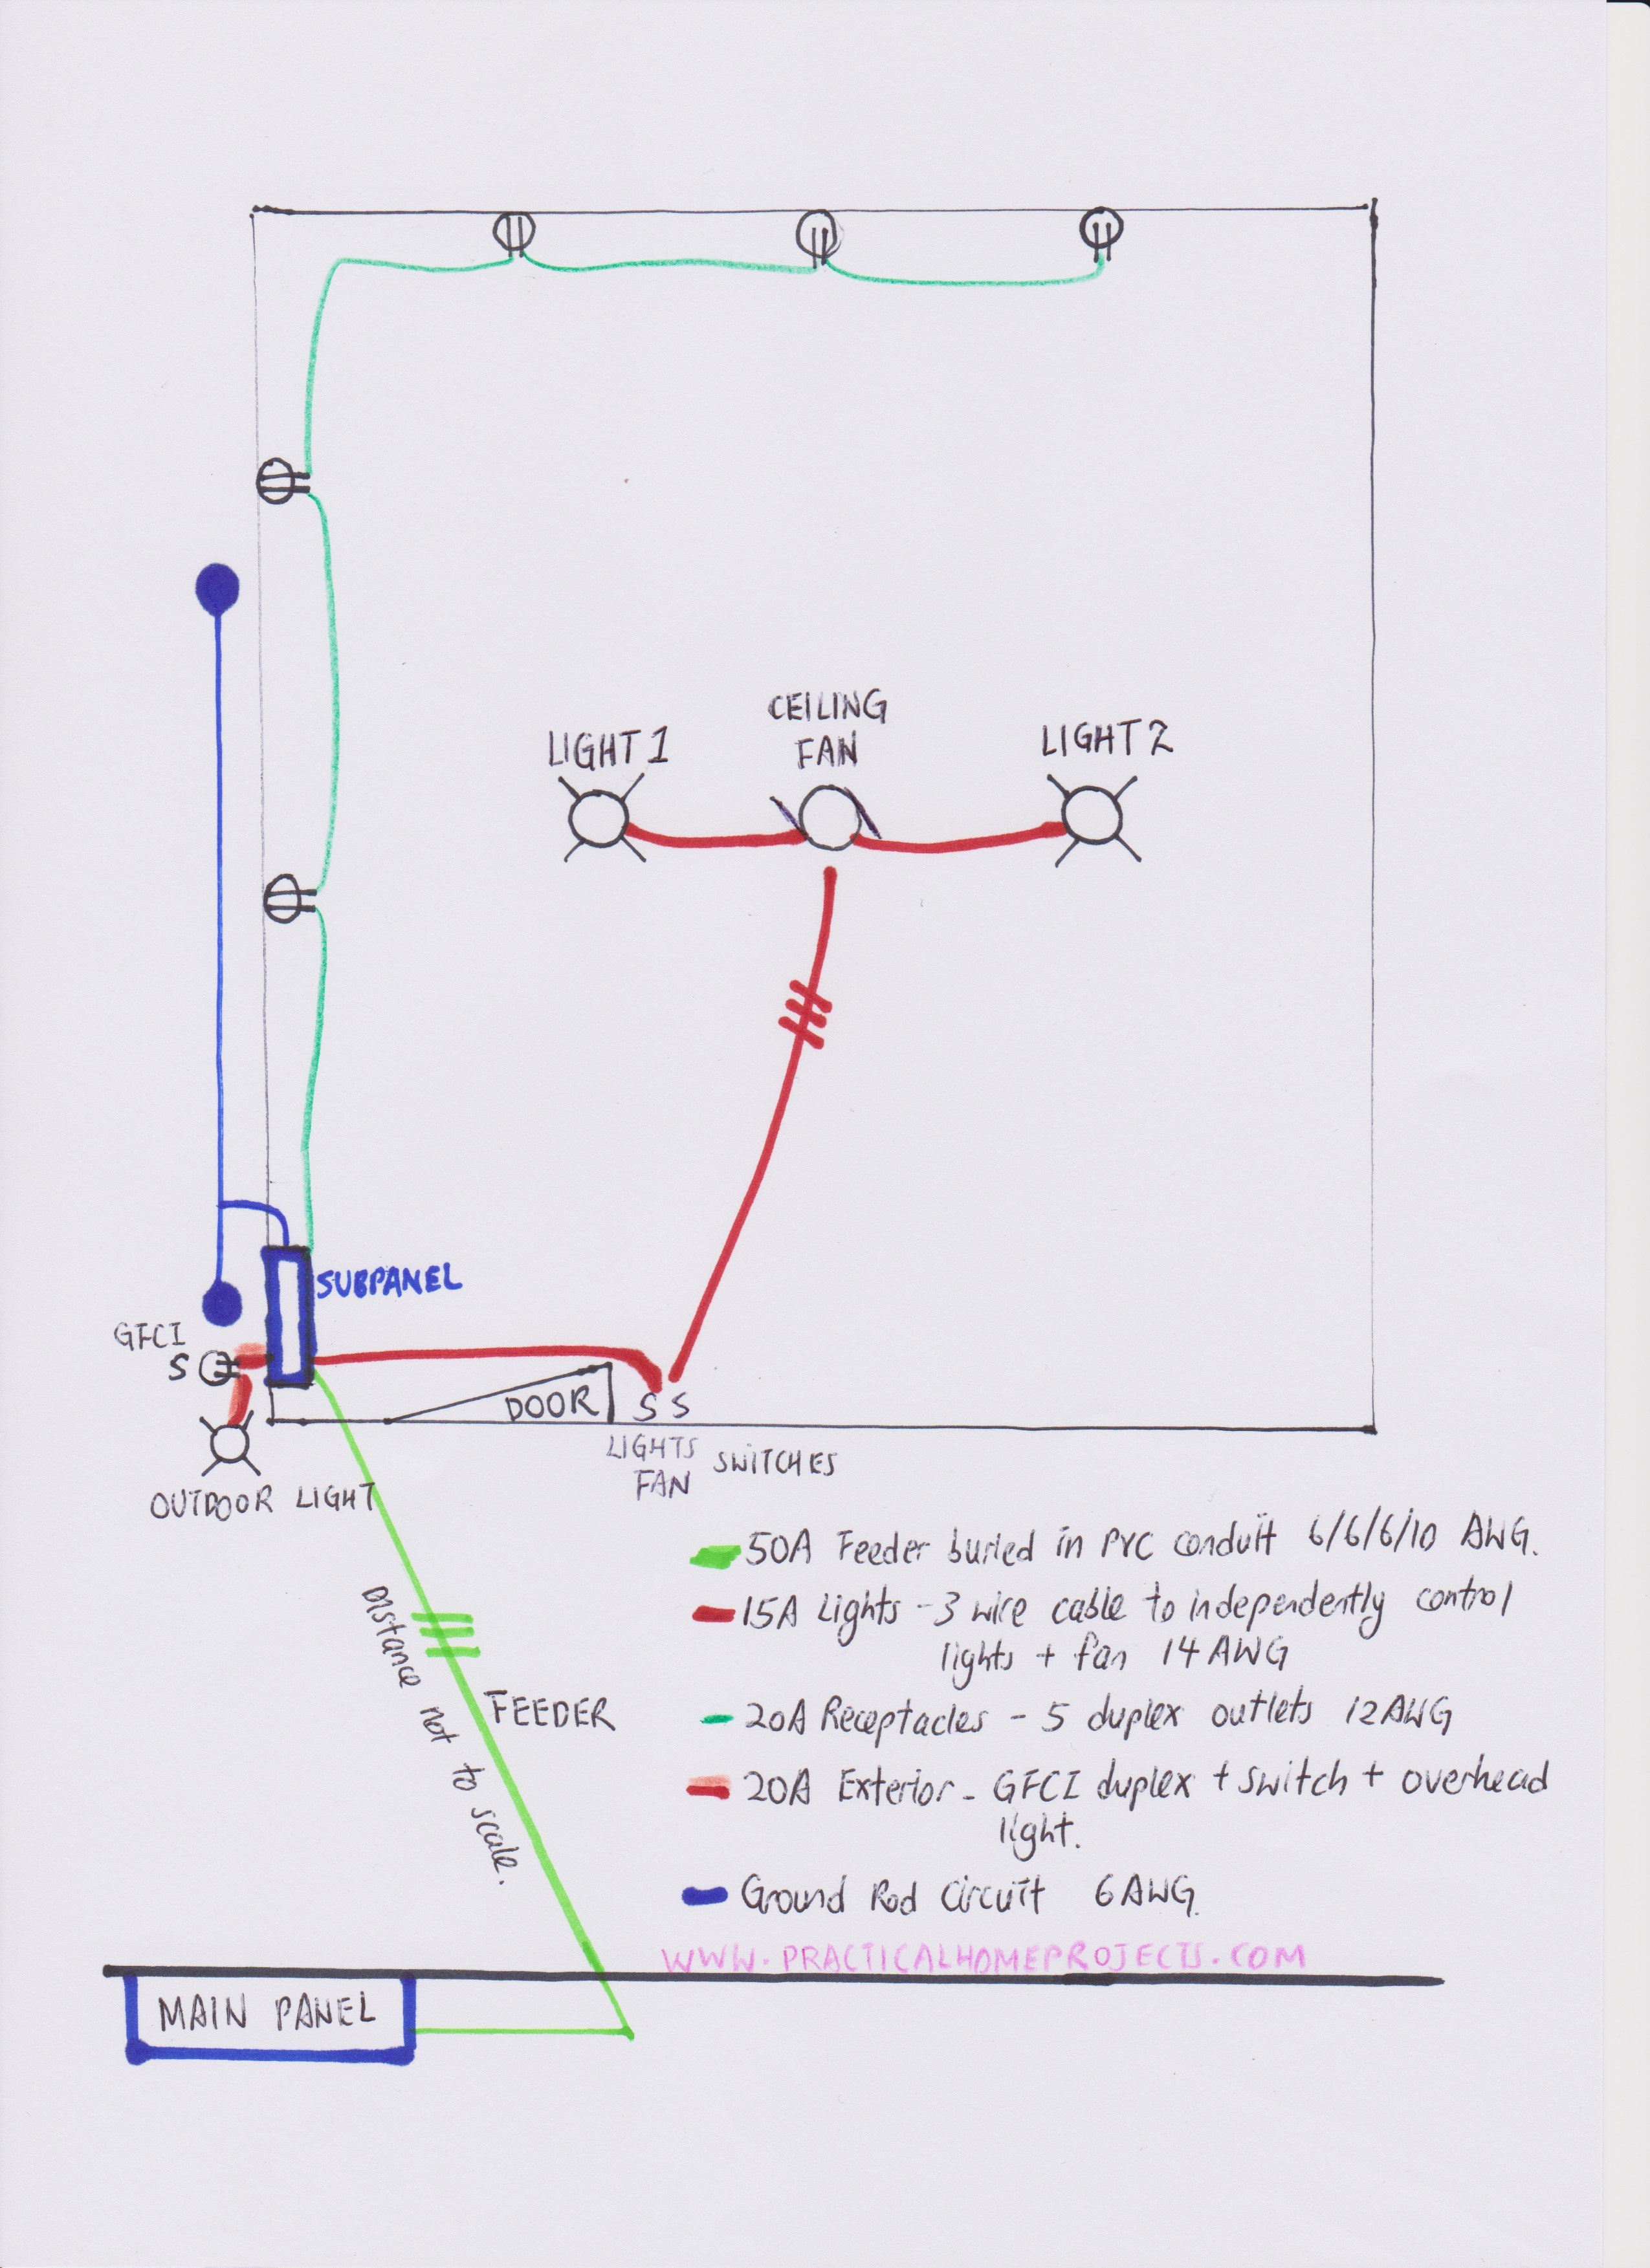
Once you’ve got the devices all labelled, draw out the wiring. Your inspection agency will appreciate the effort if you create a full wiring diagram like the one below.

Best practice is to keep the light circuits separate from the outlets so that if you over do it with your outlet circuit, it won’t put you in the dark. I added a circuit for an outdoor light and receptacle as well. Plan for future upgrades or expansions by buying a bigger panel than you’ll need initially.
Planning the feeder line will be your biggest consideration of the entire project. Breaches through exterior walls, trenches, PVC glue, and possibly some drywall work inside will make you question what was so bad about rolling up the extension cord every once in a while.
Direct Burial Cable or Individual Wires in Conduit?
You can save some money by using a direct burial cable instead of THHN/THWN wires plus a conduit. From an installation perspective, the only downside is that direct burial cable usually needs to be buried at 24” versus 18” (PVC conduit) or 12” (metal conduit). Direct burial cable has a thicker sheathing than romex and doesn’t have the paper sleeve.
I’d still prefer to have the protection of conduit, especially if you live in a rocky environment. Over time as the soil compacts and freezes it can cause micro abrasions on the cable itself. Direct burial makes sense to me in two cases:
- If you choose Option 2 and are running a 20amp GFI protected circuit, the direct burial cable only needs to be buried 6”. This is because if the cable were cut, the ground fault would cause the circuit to disconnect immediately.
- The second reason is if you had a particularly long or curvy route and didn’t want to pull wires through a conduit to your destination.
Wire sizing for your Subpanel
Use the table below as a guide to determine which wires to use with your subpanel. Please view table 310.15 to ensure that your wires are rated for the ampacity at the appropriate temperature. Below is a summary of some of the common combinations assuming a four wire set up.
| Max Current – Amps | Live Conductor Size – AWG | Ground Conductor Size – AWG | Conduit dimension – inches |
| 30 | 10 | 12 | ½” |
| 40 | 8 | 12 | ¾” |
| 60 | 6 | 10 | 1” |
| 100 | 3 | 8 | 1 ¼” |
Southwire has a great Conduit Fill calculator https://www.southwire.com/calculator-conduit
There are more lenient requirements for the feeder lines going to your main panel.
Calculations are done for Copper Wire, Larger wire gauge and conduit required for Aluminum. This is a guideline based on THWN-2 wire and standard breakers rated at least 75C
Conduit sizing must be below 40% by code. The recommendations shoot for 20%-30% fill
These values are valid when the total circuit length is less than 100ft; if you have a longer section of wiring, you’ll need to do a resistance and voltage drop calculation to get the correct breaker and wire gauge combination.
I strongly recommend moving up a size in conduit to facilitate pulling the wires and to make space for future upgrades. I ran four uninterrupted wires from the main panel to the subpanel, and I recommend you do the same if possible. Every splice in the wires will add electrical resistance to your load and is an opportunity for something to become disconnected.
Connections in the Sub Panel
- Leave a little bit of slack in your feeder lines in case anything inside ever needs to be reoriented.
- Keep the light circuit separate from the others so that you aren’t left in the dark if a breaker trips.
- The neutral bar needs to be completely isolated from the ground. The ground bar should be bonded to the panel itself via a big green screw.
- Do your best to balance the loads by splitting the expected current draw evenly among the two phases.
When installing power beyond the basic 20amp GFI circuit, there are a few more steps to take to make your space safe. There needs to be a main cutoff, so if the panel doesn’t have a main breaker, you’ll need to install one.
You’ll also need grounding rods. You’ll want two grounding rods at least 8 feet long and at least six feet apart. See our video for an easy way to install these. Ideally these will be connected with a continuous wire and by a corrosion resistant connection. I used the simple acorn style clamp, but the one shot welding devices are popular as well.
Once you’ve got all of your connections made it’s time to get the inspection completed. Speak with your AHJ (Authority Having Jurisdiction) to determine whether they need a rough in inspection, or just a single final inspection.
Potential Reasons to Fail Inspection
- Holes drilled through studs not at least 1 1/4″ from the surface. I use a 7/8″ bit right through the center of the framing member, but you can always use a simple nail plate if needed.
- Electrical connections not secured with the proper fasteners.
- Grounding rods not properly connected.
- Incorrect wire sizing for all components.
- Trench not sufficiently deep at all points.
- Conduit installed in high traffic area and not protected from damage.
Conclusion
Electrification of your shed is one of the highest ROI upgrades you can make for your home. I hope this guide has been a helpful outline, and that you consult knowledgeable electricians while you iron out the details. Remember to:
- Be safe.
- Make it legal.
- Oversize for future expansion
- If you have any questions, call your local code enforcement.
If you like to see the video of us installing electricity in our shed, just click on video below! If you like our video and what we do here, please click the “like” button and subscribe to our channel, hope to see you there!